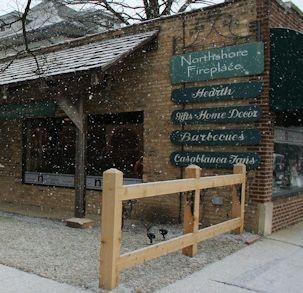
|
Directions on lighting a pilot on a set of traditional gas logs
in your fireplace.
Please read these instructions prior to watching the video as
they will help you in understanding the landscape before proceeding
to re-light your pilot.
TOOLS FOR THE JOB
- Butane lighter or long matches
- Old cardboard box or some old newspaper
- Gloves
- Flashlight (helpful)
Most pilot re-lighting is necessitated by either mistakenly turning
off the gas supply or having had the pilot flame blown out by
a downdraft from the chimney. In either case it is important to
locate the pilot assembly prior to re-lighting.
1. You may want to wear gloves and have a carton or spread paper
nearby to place the logs, as they maybe sooty. Begin by
removing the uppermost logs from the stack, to the side of the
knob and visually locate the termination point (pilot assembly)
of the thin copper and slightly larger aluminum lines from the
back of the control valve. You will see a hooded deflector cap
at the top of the pilot assembly. This is the intended location
of the burning pilot flame. Now open the flue and confirm the
gas supply to the fireplace is on.
2. Go to the control knob and rotate it to the pilot position.
If the knob is located to the right of the stack of logs the indicator
should point straight up (12 o'clock), if on the left, it should
point straight down (6 o'clock). In either case, it is at this
position that you should be able to depress the knob, 3/8 to 1/2
of an inch. Note, if the indexing has faded from the knob just
rotate it the full range, 1/2 of a full rotation
|
and then return to the midpoint of the rotation where you should
be able to depress the knob as above. You may need to wiggle the
knob to find the exact slot that will allow the depression.
3. Now you need a match or butane lighter. Light and hold the
lighter flame near the termination hood on the pilot while depressing
the control knob. You may notice some deflection in the held flame
caused by the escaping air. Continue to hold the flame and the
knob until the pilot flame is re-lit.
4. Continue holding the knob in for up to 60 seconds, which
allows the thermocouple to warm enough so that the pilot flame
will continue burning once you release the knob. If the flame
goes out when you release the knob, repeat the above process until
the flame stays on when the knob has been released.
5. Restack the removed logs.
6. Back away from on top of the logs and rotate the control knob
in a counterclockwise direction, approximately 1/4 turn. This
should light the main burner and your back in business. Rotate
the knob back to the pilot position to turn off the logs while
allowing the pilot to stay lit for the next time. To shut both
the logs and the pilot off rotate the knob to its full clockwise
position. You may find the following videos helpful in relighting
your pilot.
http://www.youtube.com/user/hargrovemfg?feature=mhee
http://www.youtube.com/watch?v=R29qgrIVIjQ
If you continue to have difficulty we can schedule a service
visit to address your needs.
|